In this excerpt from the video “Andrew Scheps: Mixing The Heavy,” Scheps offers a concise and easy-to-understand explanation of the differences between insert compression, limiting and parallel compression. He does so in the context of discussing why he chose a limiter over a compressor for the fuzzed-out bass in the song he’s mixing in the video.
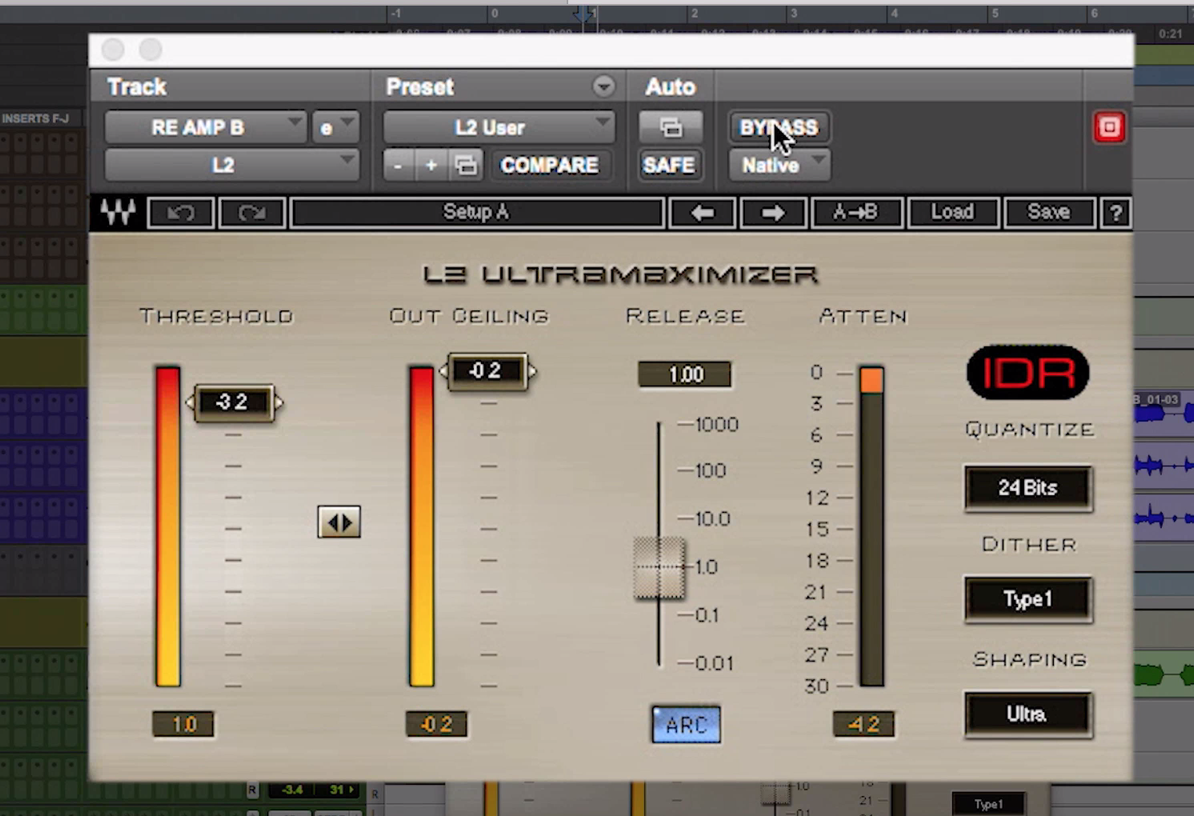
He explains that he is using a Waves L2 limiter as the last insert in the effects chain on the bass part in question. He sets the Threshold at -3.2dB, the Output Ceiling at -0.2dB and chooses the Auto-Release option on for the release time. After playing it with and without the limiter, he comments that the L2 is doing its job by evening out the level of the notes in the track.
HITTING THE WALL
Scheps points out that a limiter is just a compressor with a 100:1 ratio, which means it’s essentially a “brickwall compressor.” Why does he use the term “brickwall”? He points out that at a 100:1 ratio, you’d need to increase the input level by 100dB just to get a 1dB boost in gain. That’s a pretty solid wall.

Here’s the setting Scheps uses for applying the Waves L2 limiter to the fuzz bass in the video.
By virtue of that extremely high ratio, a limiter acts differently on your audio than a compressor does. Scheps says he likes to visualize a compressor as pushing down the tops of the notes. But with a brickwall limiter it’s more like it’s pushing all the audio up against the ceiling. Whatever hits the top doesn’t clip, it just flattens out and can’t get any louder. The result is that the dynamic range (the difference between the quietest and loudest notes), is reduced.
Scheps also mentions that for the most part he doesn’t use a lot of insert compression because he feels it changes the character of instruments too much, especially when he’s trying to keep them sounding natural. He says that if the electric bass wasn’t fuzzed out, and he wanted to maintain its natural sound, he would probably have used a parallel compressor to even up the dynamics. That would have entailed duplicating the bass part (or bringing it up on another track with a bus send and return) so that there were two bass tracks. One would have no compression, and the other would be heavily compressed.
He’d then blend in the compressed track slowly until the combination compressed and uncompressed tracks created a sound he liked. Because the original track would still be the predominant one in the signal, the overall tone of the bass, especially the attack and release of the notes would remain more natural sounding, but the dynamic range would be reduced somewhat.
Scheps describes the parallel compression as the “best of both worlds,” because it doesn’t affect the instrument’s natural sound yet results in dynamics that are more controlled. He says that the decision of whether to use a limiter, compressor or parallel compressor comes down to how much of the original character of the sound you want to keep. He says it depends on what you’re compressing and on the particulars of the song you’re working on, and that over time, you’ll develop a “library” in your head of what sounds good in what situations.
BASS VS. BASS
Let’s listen to an example of various compression strategies on a clean electric bass part that will demonstrate what Scheps was talking about:
The following three examples feature the same bass part, but in each one features a different approach to compressing it:
Example 1: Bass with insert compression.
Example 2: Bass with parallel compression
Example 3: Bass with a limiter. (Note that the limiter made this track substantially louder, but to avoid the “louder is better” effect for this listening comparison, we adjusted its overall level to match the other examples.)

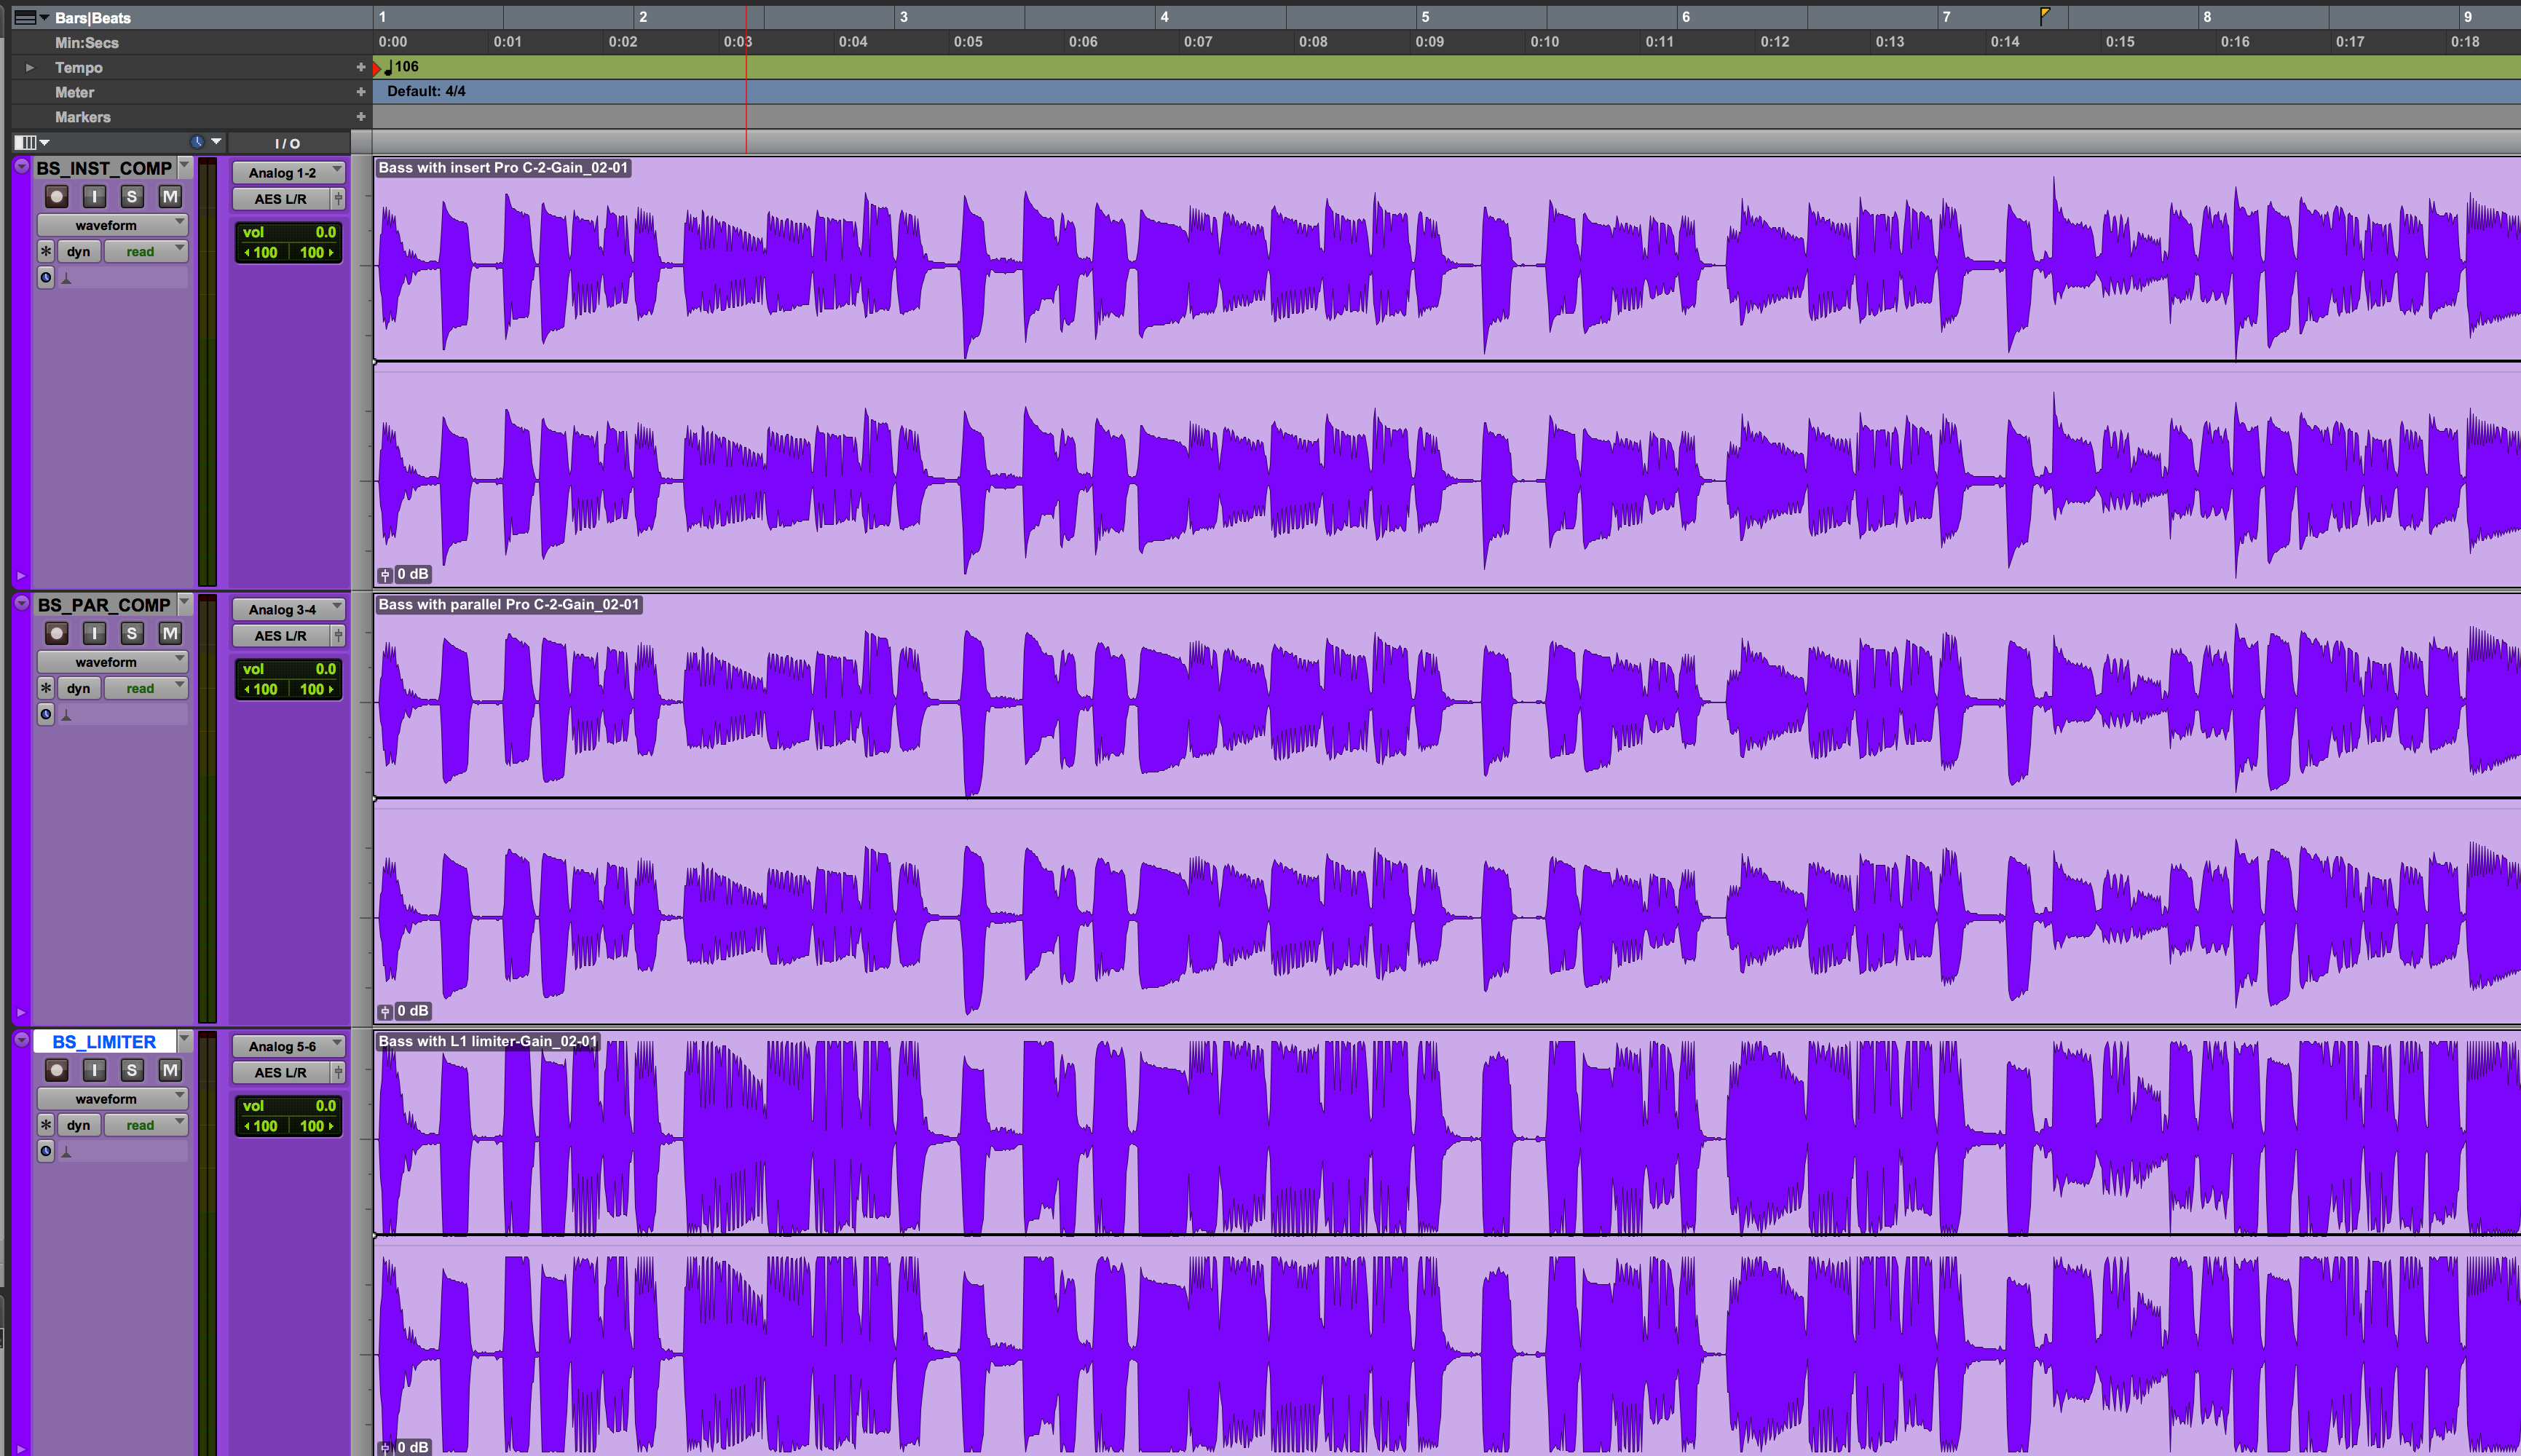
In this screenshot, you see the waveform for the same bass part with three different types of processing: Insert compression (top), parallel compression (middle) and a brickwall limiter (bottom). Notice how the limiter has both reduced the dynamic range and made the whole track louder. The dynamic range of the parallel-compressed track is somewhat reduced.
SEEING DOUBLE
Parallel compression can also be a really effective technique on vocals, guitars, drums and virtually any source. That said, it’s more involved to set up and may not be practical in some cases (perhaps you’re dealing with a large number of tracks that would need to be configured for it, or you don’t want to clutter up your session with a lot of duplicate tracks or complex routings). When you want to use an insert compressor on the track, but are trying to keep a more natural sound like you can get from parallel compression, here are a few tips:
- It may seem obvious, but use as little compression as you can get away with to achieve your sonic goals for the track. If you’re trying to tame dynamics, you can do additional peak reduction with volume automation.
- Be careful of your attack settings. An attack set too fast can squash down the transients of notes and make an instrument or vocal sound unnatural. Over about 12ms is usually safe for preserving the attack.
- You can achieve what is essentially parallel compression by inserting a compressor with a mix (aka “wet/dry”) control and turning it substantially below 100%.