Imagine this: you’re mixing a song built around a unique loop. The loop contains drums along with several other instruments. It has a cool groove, but the drum sounds could be more robust. You can’t replace the drums inside the loop, so what do you do to strengthen them?
In this excerpt from Pro Member Mix Fix: Six Of One - Episode 1: Session Setup & Drums, Fab DuPont solves that exact puzzle with a simple, yet powerful solution. He decides to layer the kick and snare hits in the multi-instrument loop in the Six of One song “Some Summer Day,” with samples.
Fab points out that if he had to layer sounds for every kick and snare hit in the entire song, it would be a huge undertaking. Fortunately, the loop is only two measures in length and then repeats throughout. All he has to do is layer the drum sounds in those two measures and then copy and paste them over the rest of the song. He’ll need to choose samples that work well along with the original sounds, and also make sure they’re in phase with each other.
He creates two tracks, one for the kick sample and one for the snare sample. He says it isn’t absolutely necessary to do this layering, but he thinks it will make the drums sound more modern and "in your face."
A Kick in Time
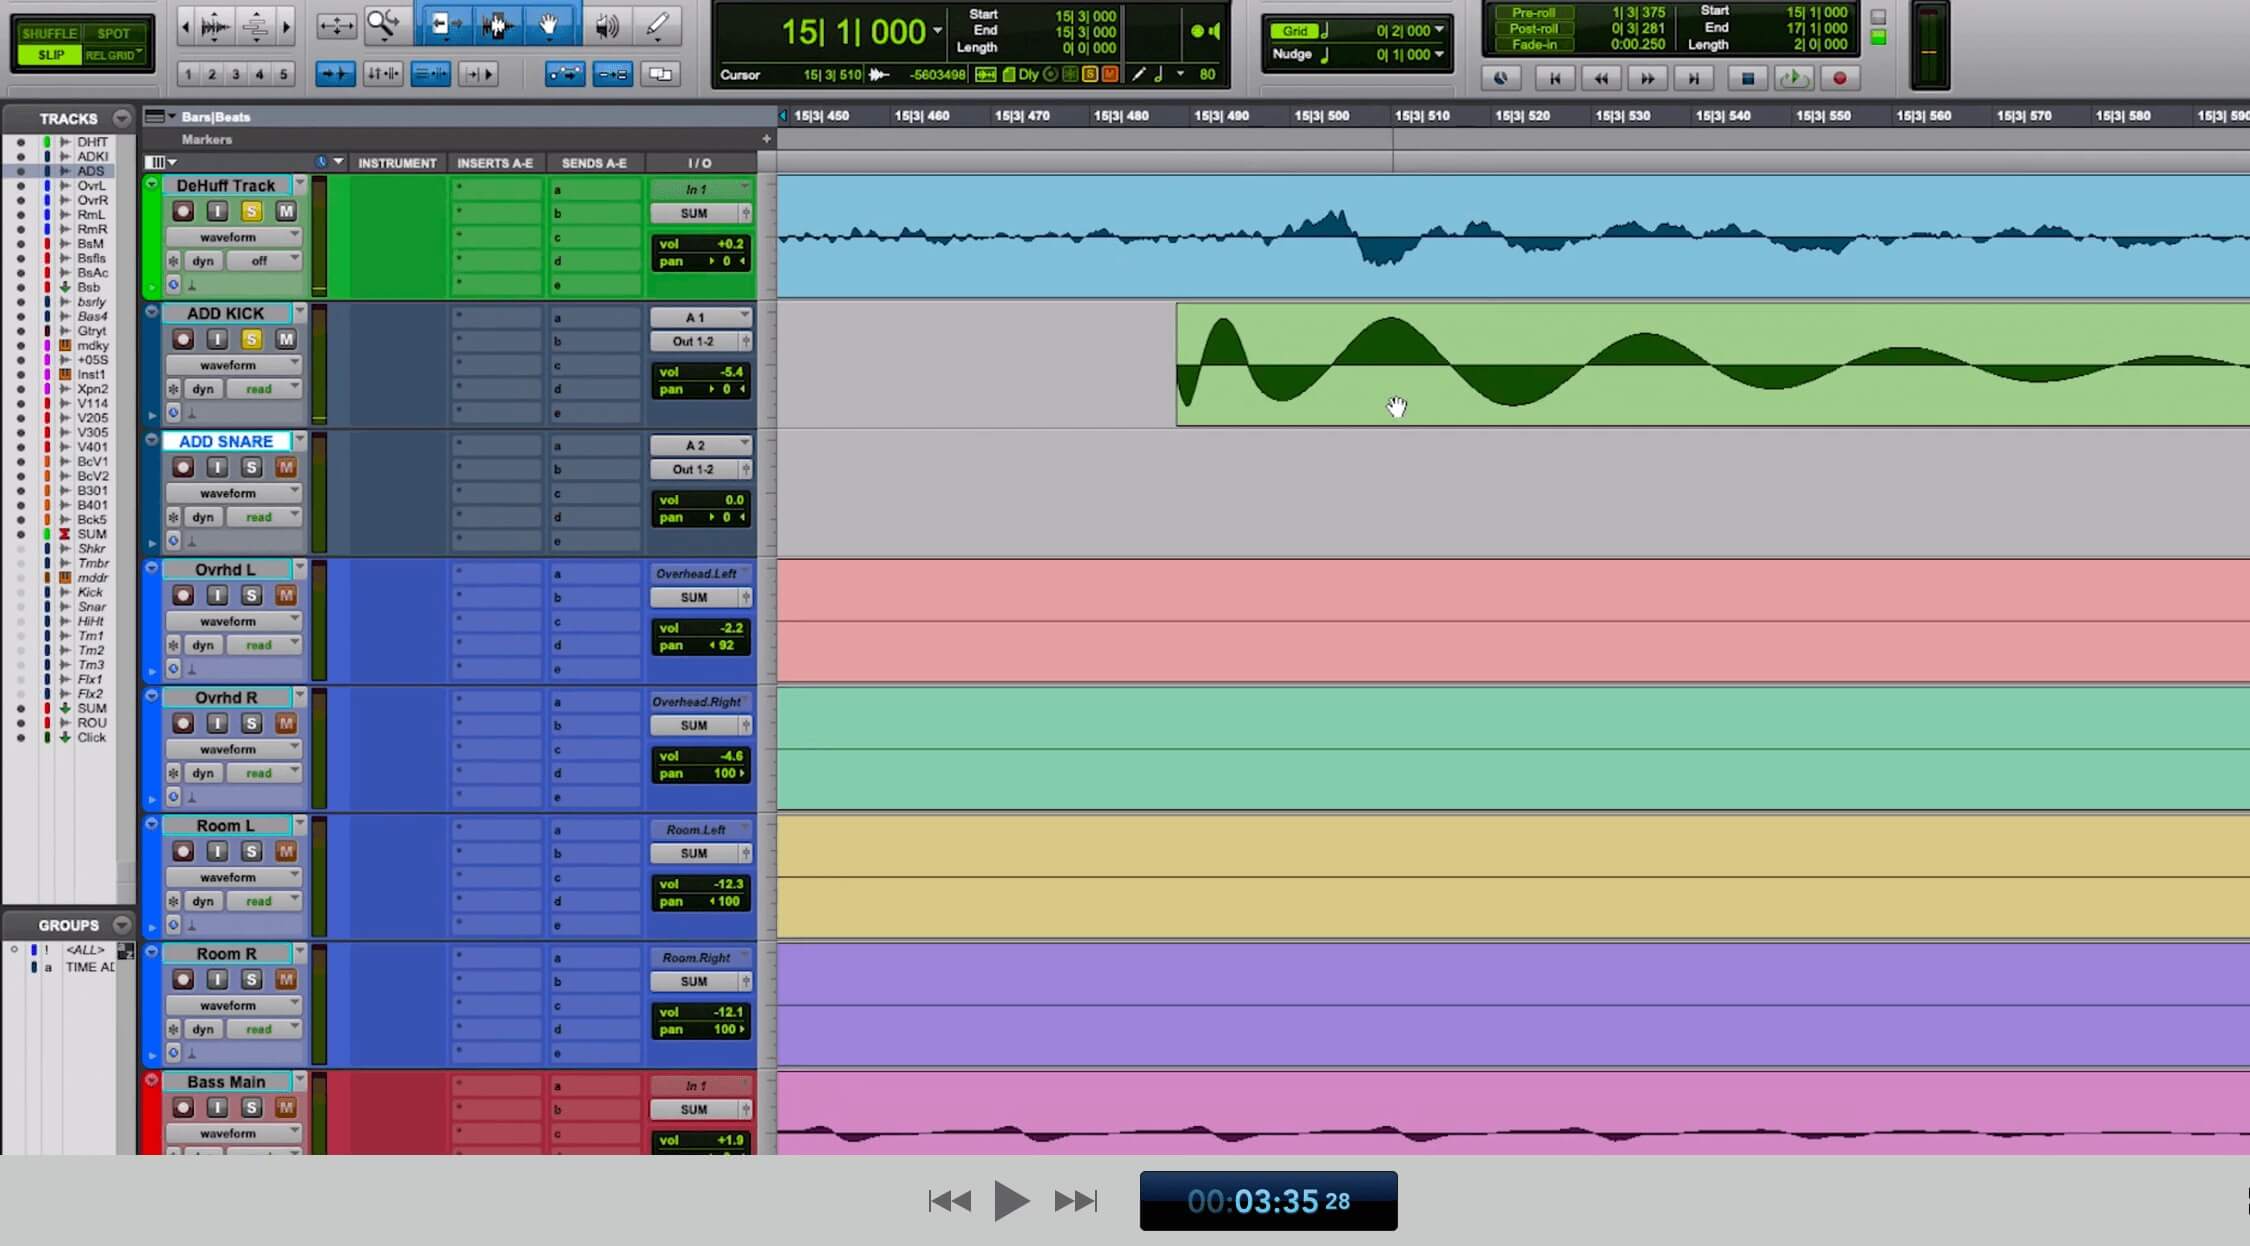
Fab opens his sample collection and starts by auditioning TR-808 kicks. He finds a sound he likes and pastes it at the beginning of the first measure he’s working on. You can see when looking at the two tracks together that the sample starts a little earlier than the kick in the original loop. He drags the sample so that its start point aligns with the existing kick. He plays them together, and it sounds better and thicker.

When added at the bar line, the kick sample doesn’t line up with the one in the loop.
When he attempts to move the kick hit to the same location in the second bar, he realizes that the original loop wasn’t quantized. He’ll have to align the rest of the hits manually
After copying and placing the samples for the kicks in the two-measure section, he sets Pro Tools to loop that two-bar area. With the play button set to loop, he sets a range at the top of the timeline and then deselects the Link Timeline and Edit Selection button. Now he can make selections anywhere, but the transport will play only the range he set.
He listens to the section with and without the kick sample. The layered kick sounds fuller and better.
When he attempts to move the kick hit to the same location in the second bar, he realizes that the original loop wasn’t quantized. Now he’ll have to align the rest of the hits in the two-bar section manually.
When zoomed in and looking at the original and the kick sample together, you can see that they appear to be in phase. But to be sure, Fab opens the UAD Little Labs IBP plug-in and inverts the phase (the polarity, actually) and the two kicks together sound even better, so he leaves it like that.

The UAD Little Labs IBP plug-in is what Fab used to invert the phase on the kick sample.
Setting the Snare
Next up is the snare. Fab once again digs into his sample collection, which he accesses through the Pro Tools Workspace feature, and auditions several snare samples. Eventually, he settles on a relatively natural-sounding one and places it under the first snare hit in the 2-bar section.
Fab explains that you could use Pro Tools’ Tab-to-Transients feature to find the exact spot to align the sample with the snare hit’s transient. The idea is to place the cursor right before the event in the original track and press the Tab key. If you’ve activated the Tab-to-Transients button, the cursor will move to the beginning of the next transient.
Then, you click on the name of the track where you’re placing the sample to select it, and the cursor will move to that track, making it easy to paste your sample precisely in the right place. He jokes that that’s “what adults do,” but says “there aren’t adults around here.” So, he places it by using his eyes.
After another playback, he says he likes it, and he’ll brighten it later.
Fab then selects the three snare hits from the first measure, and, while still in Relative Grid mode pastes them into the next bar. He says that one of the samples feels late to him, so he goes in and adjusts it by hand. After that, he plays it again and now is satisfied with the sound.
Next, he solos the kick and snare samples and, after listening, decides to adjust the clip gain on the first snare hit to match the lower level of the corresponding one in the loop. He also adjusts it in the same spot in the next measure. He says, though, that both measures don’t need to be the same.

After aligning the layered kick and snare samples, Fab groups them and duplicates them to fill the rest for the measures of the song.
Then he groups the new kick and snare hits for the two measures and uses Command-D to duplicate the group throughout most of the song except for the first two bars. He observes that it’s cool to have the samples come in on the third measure of the song rather than right when the loop starts.
Inside the Bar
In the excerpt, Fab demonstrated a relatively easy way to enhance drum sounds in a loop. In “Some Summer Day,” the loop contained other instruments, so he opted to layer sounds on top of the existing ones. That way, he wouldn’t disturb the loop itself, which was foundational to the arrangement.
But here’s a different scenario: You’re mixing a song that has a drum loop that sounds good and fits the groove. But the problem is that it never changes throughout and badly needs some variation.
In a situation like that, if you’re working with a loop with only one instrument (in this case drums) you have more leeway to mess with it. Depending on the loop contents, you can probably create several rhythmic variations that will help make your arrangement more interesting.
Using your DAW’s editing and processing power, you can go inside a copy of the loop and adjust rhythms. You may even be able to change the tone of particular drums if you want. Simpler beats where there are fewer overlaps between the various kit elements are much easier to work with.

If you select a hit inside a drum loop you can cut or copy it and move it around or process it destructively.
One way to change the loop rhythmically is to cut out individual hits and move them around. One of the significant hurdles you face is if the drums and cymbals in the loop overlap each other a lot. That will make it harder to get realistic-sounding results when you move them. What's more, a sample may sound cut off if another drum or cymbal starts before it finishes ringing out.
A useful workaround is to create a second drum track and use it to paste a hit that would otherwise overlap another in the primary track. That way, both the original and pasted segments can end more naturally. Make sure to add crossfades at all boundaries that you create when moving parts of a loop around.
Fill it Up
Creating fills is probably the most challenging part of this kind of drum-loop editing, because putting together, say, three eighth-note snare hits in a row can sound quite unnatural. It helps to change the level of one or two of the repeated hits in the fill to make them sound more realistic. In Pro Tools, you can easily use Clip Gain to achieve this.
You can also pitch-shift some of the hits by slightly different amounts (maybe 20 to 25 cents plus or minus) to make it sound less like the repeated hits have been copied.
Here’s an example. Well start with relatively basic drum loop with a crash cymbal added on a separate track.
Example 1b
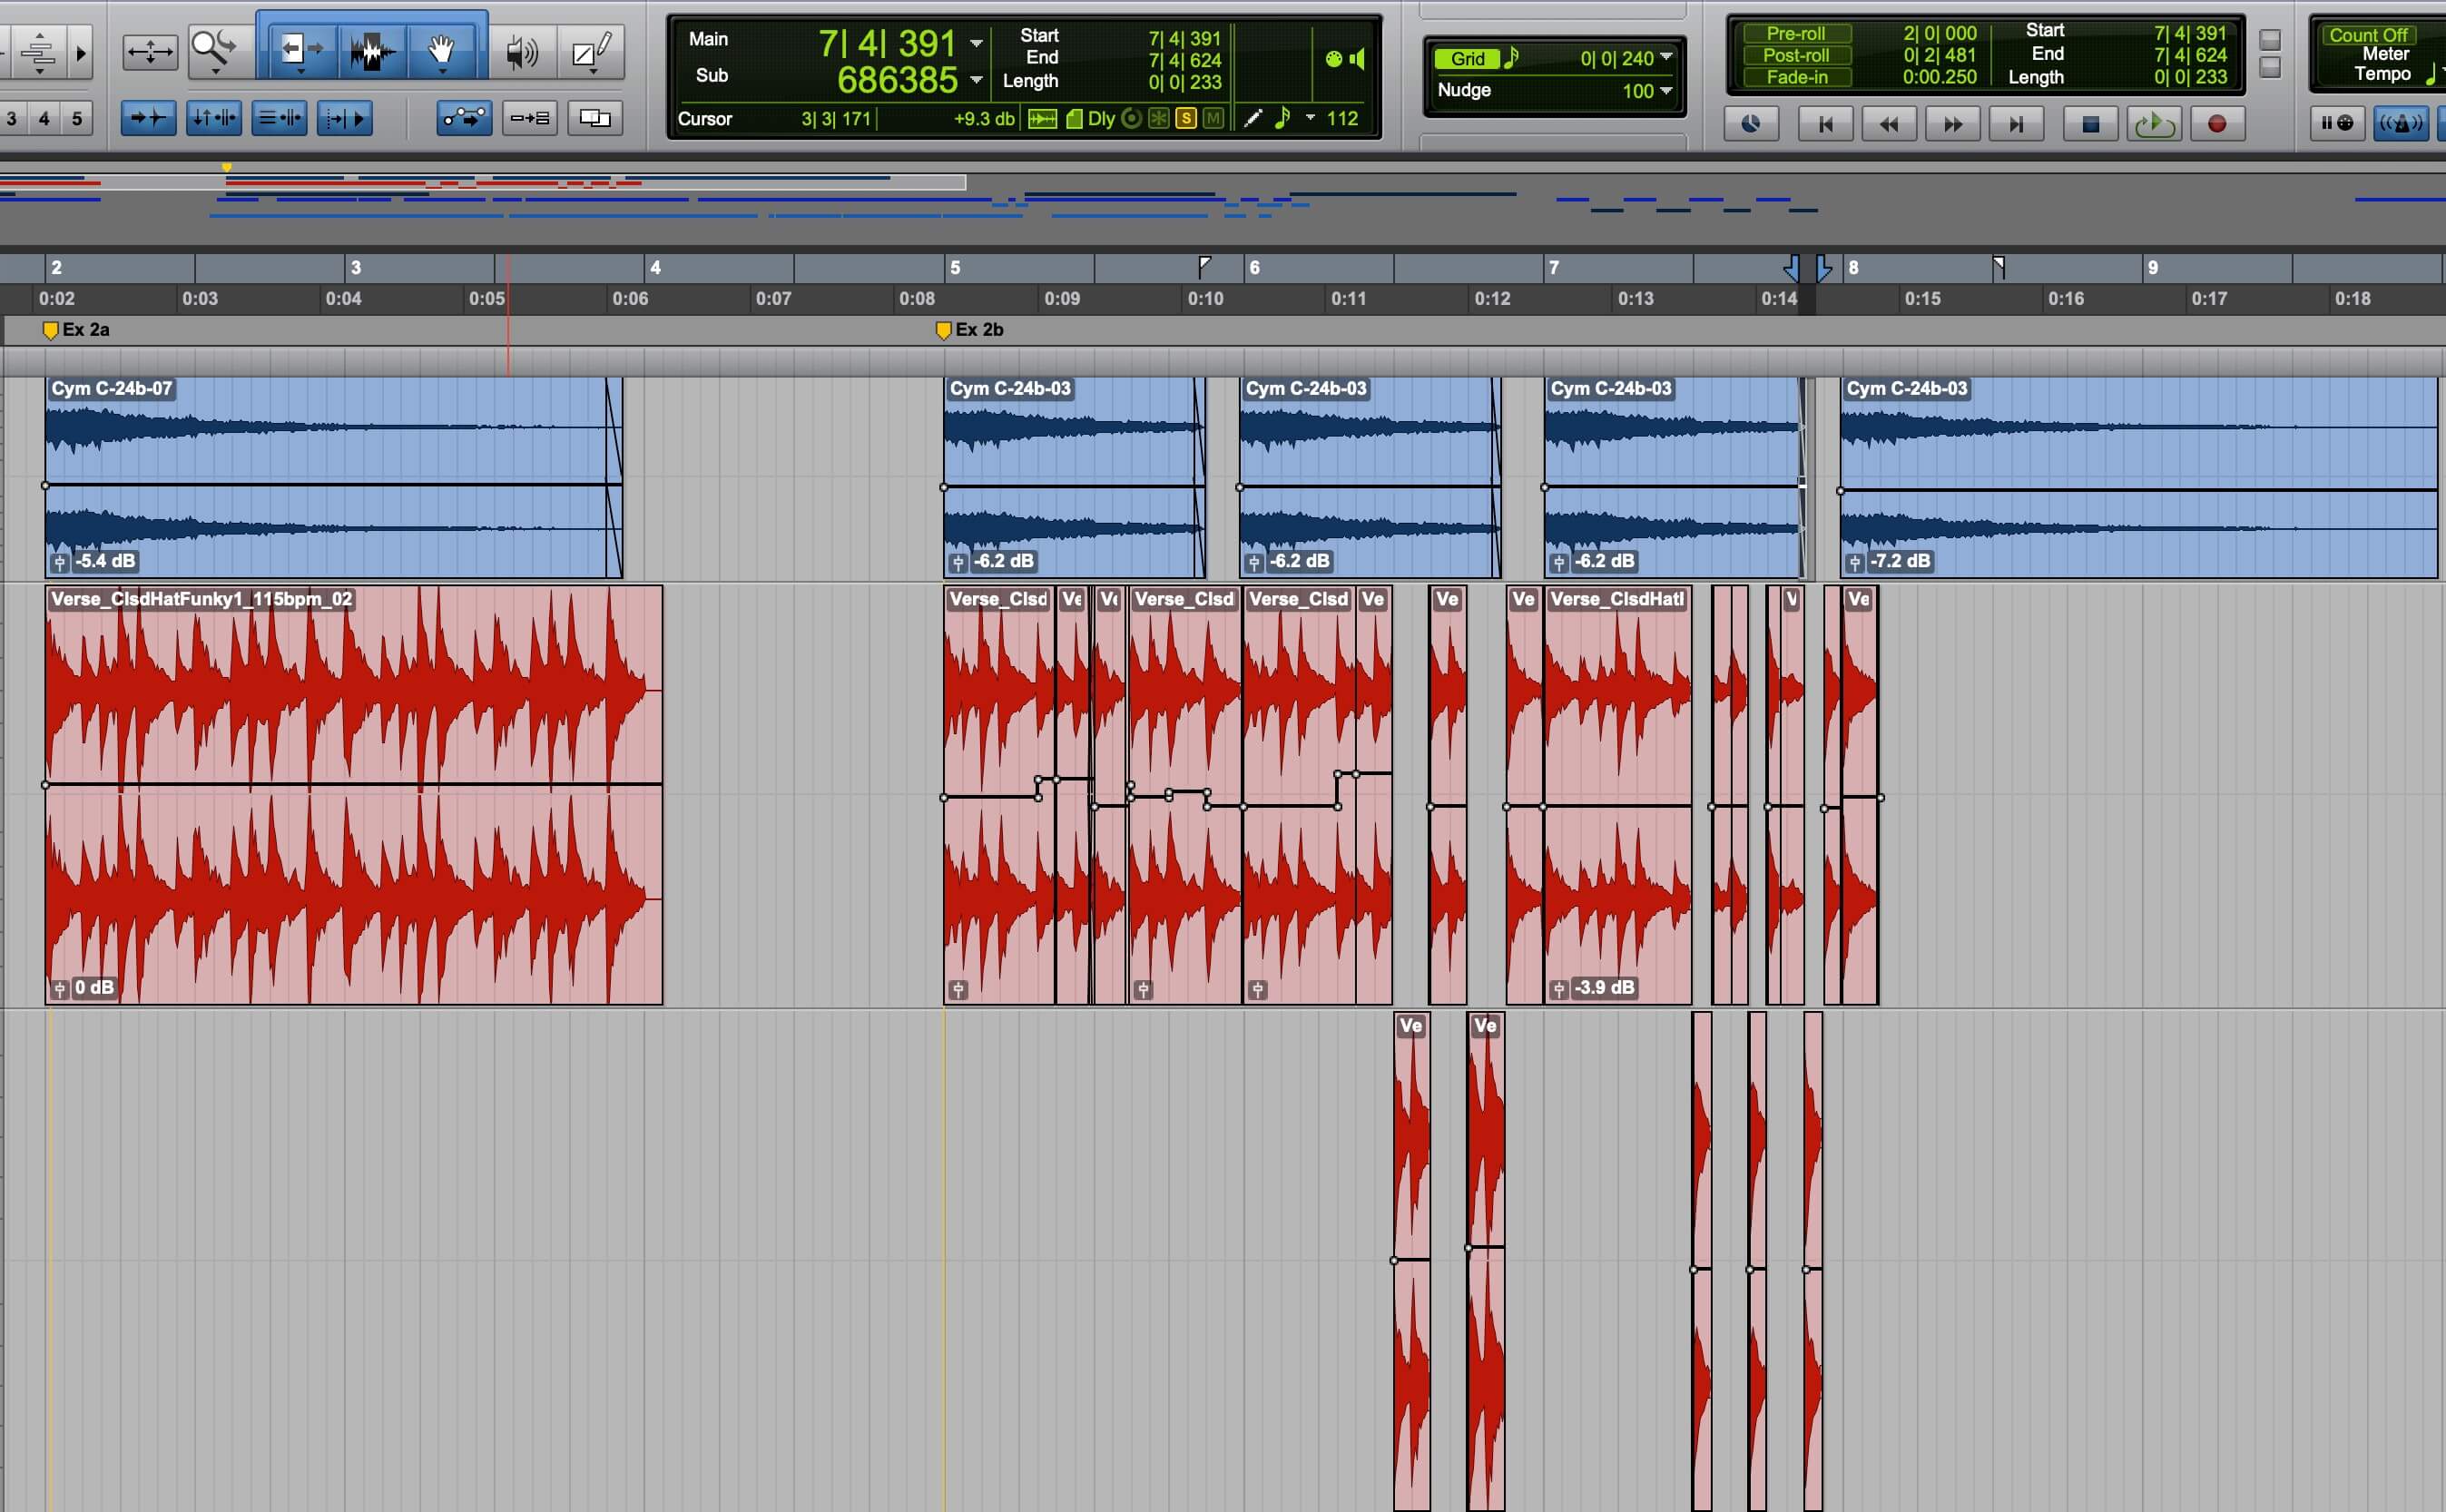
Using only that loop and some added crashes, here are some variations. These were made using mainly cut-and-paste editing, adjusting Clip Gain and doing some small pitch shifts (between about 10 and 20 cents plus or minus) to make the pasted drum sounds seem less like copies and more like consecutive hits by the drummer.
Example 1b

Here you see the original loop on the left and the rearranged ones to the right of it.
This next example uses a more complex beat. There’s less space between hits, so it makes it harder to move them around. We’ll first hear the original beat.
Example 2a
Next, are variations made from it. A couple of crashes were added on a separate track where appropriate, but otherwise it was all from that one loop.
Example 2b

The original loop is on the left and the edited variations on the right.
You can even EQ within a loop in certain circumstances. Let’s say you don’t like the tone of the snare drum, but everything else is good. If you select the snare where it’s hitting more or less by itself, you can put it on a separate track with a processor inserted. Alternatively, you could select it inside the loop and use your DAW’s destructive processing (such as Pro Tools’ AudioSuite or Logic Pro X’s Real-Time Processing) to tweak it.
Here’s another drum loop.
Example 3a
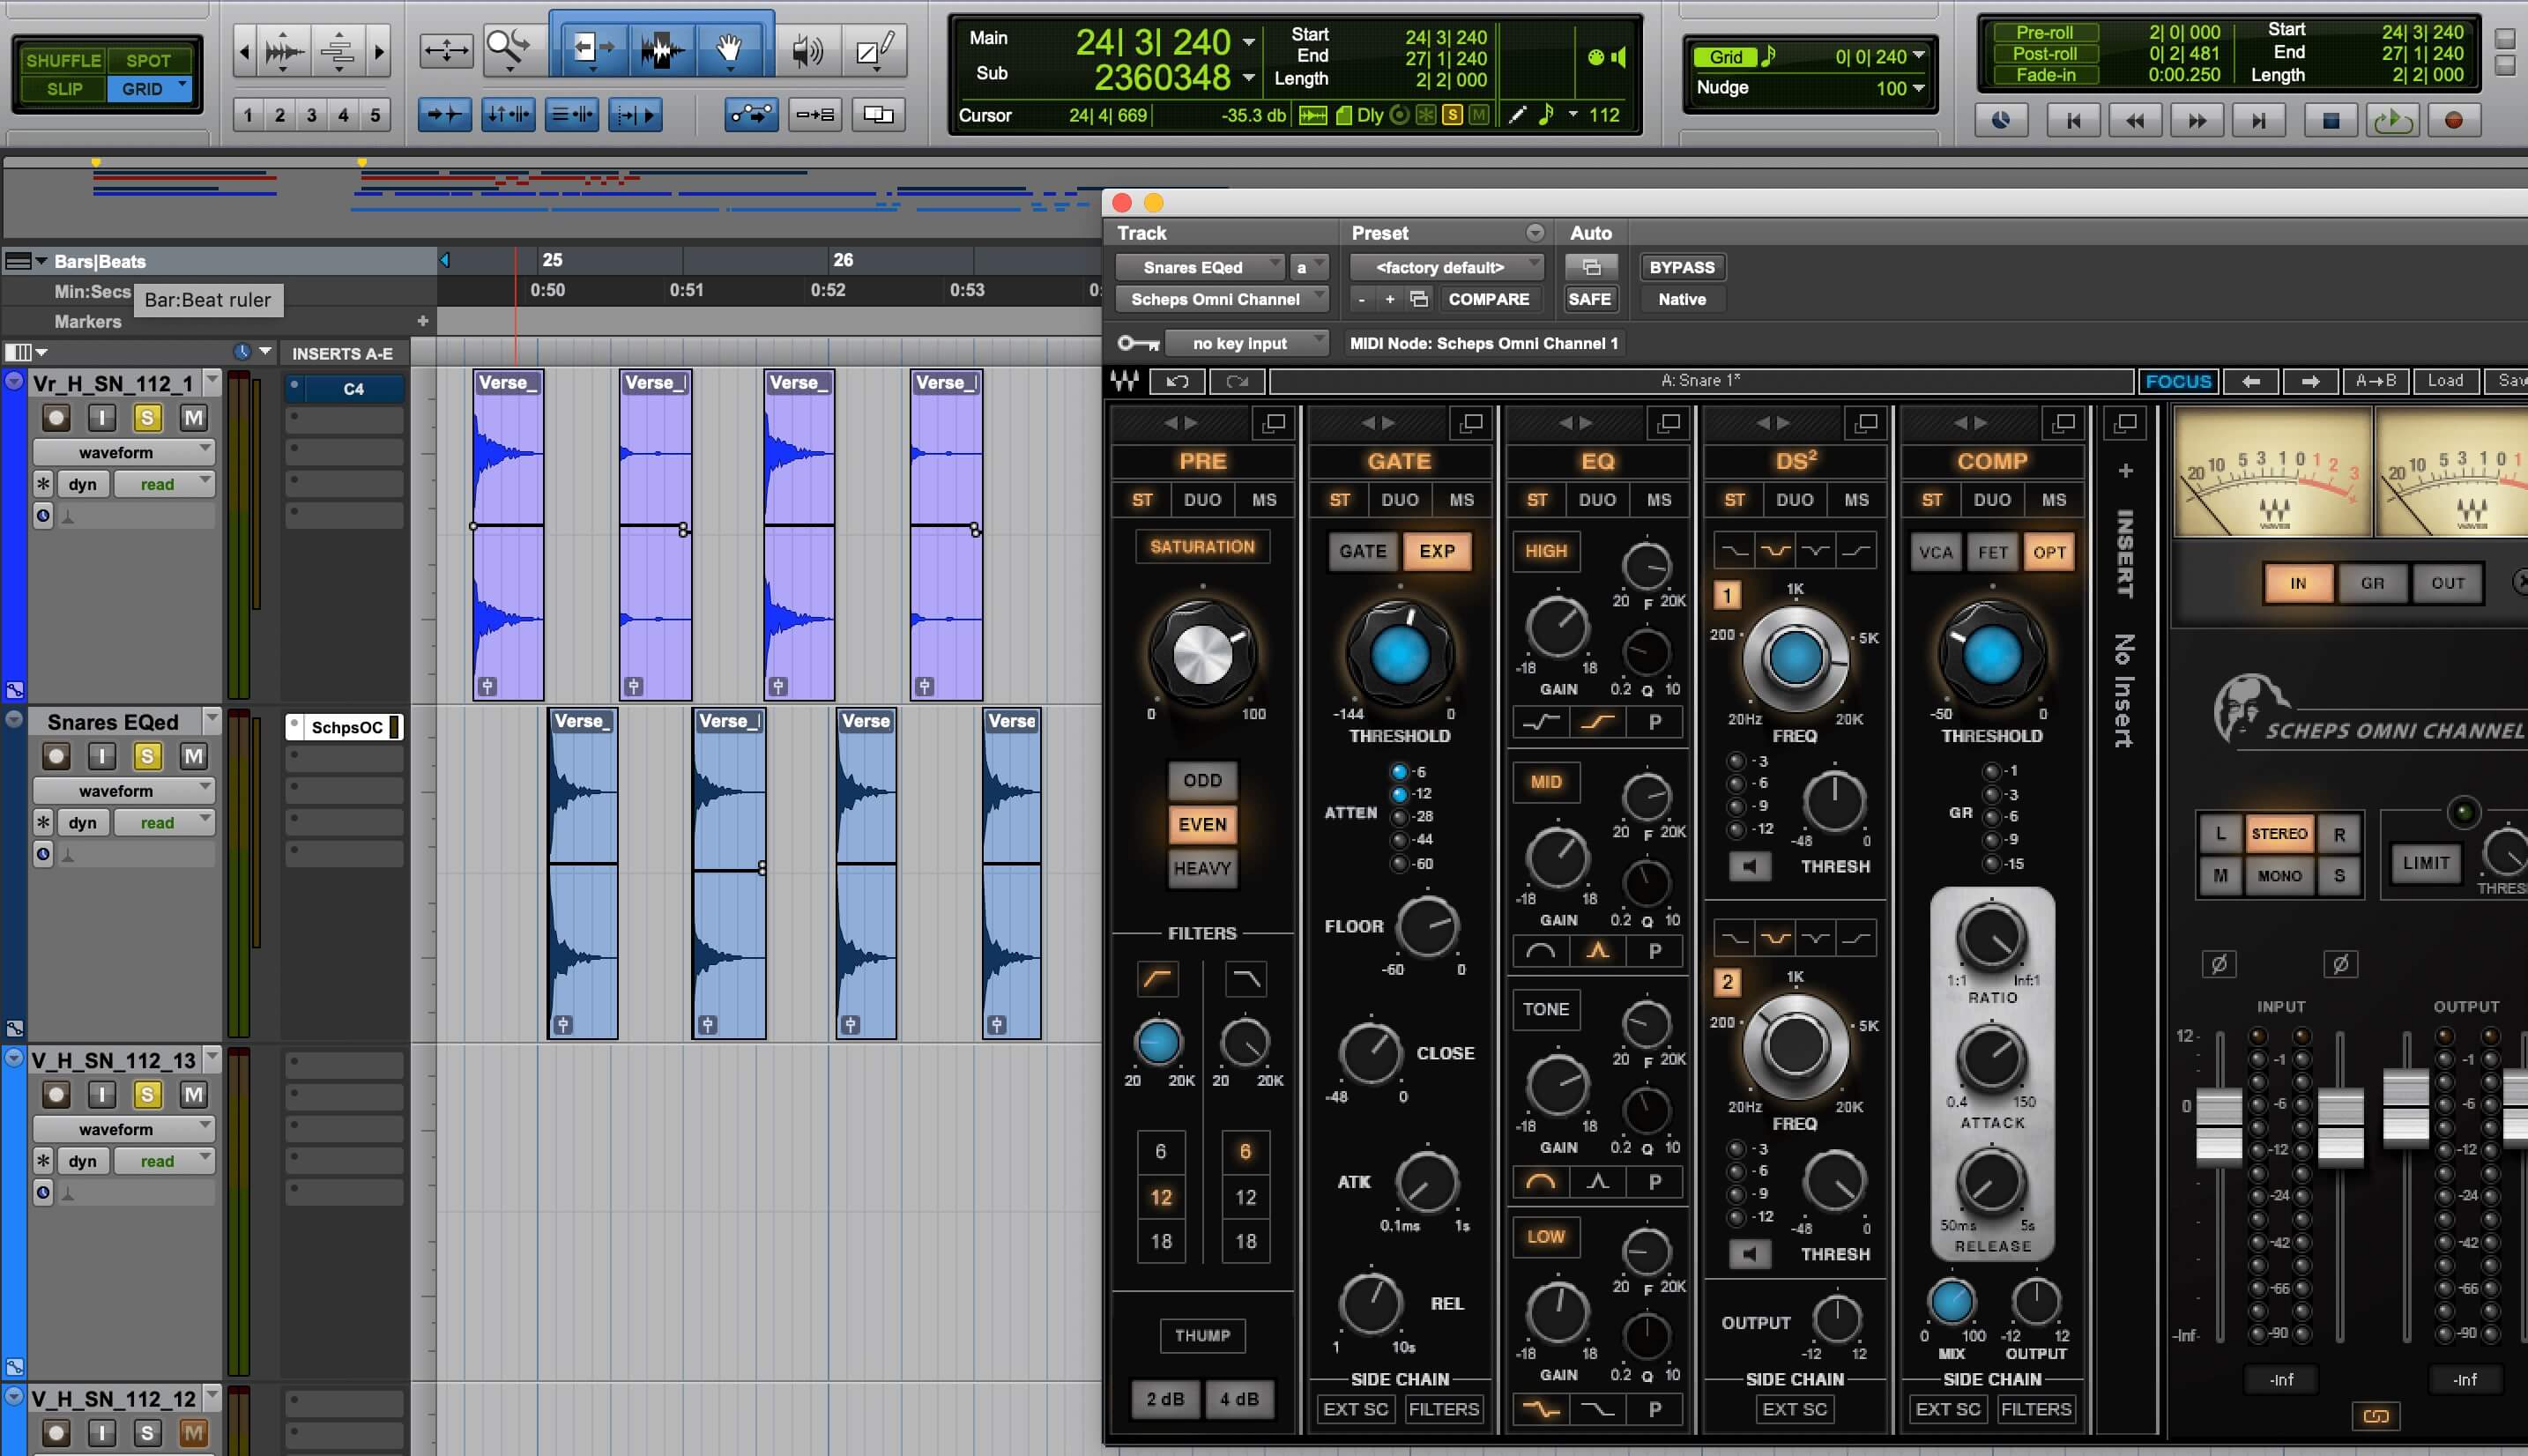
Here’s the same loop with the snares isolated and processed with a channel strip (Waves Scheps Omni Channel) that added a little saturation, EQ and compression.
Example 3b

The snares in Example 3b were pulled out of the loop and pasted on another track where they were processed.
This technique will not always work. For example, if there’s a high-hat or ride cymbal playing on the same beat as the drum you want to process, you’ll obviously be processing it, as well. Depending on how the loop sits with the rest of the mix, this may take away from the loop’s natural sound.