Master bus compression can really help solidify a mix. In this excerpt, Darrell Thorp is working on mixing a live recording of a Foster the People song. At this point in the mix, he's gotten the individual tracks pretty close to where he wants them and is now preparing to add master bus compression. He explains that because the song was recorded live in a reverberant space, compressing the transients (the initial attacks at the beginning of waveforms—for example, the crack of a drumstick hitting a snare) is important to help tighten the sound up.
HEADING FOR THE HILLS
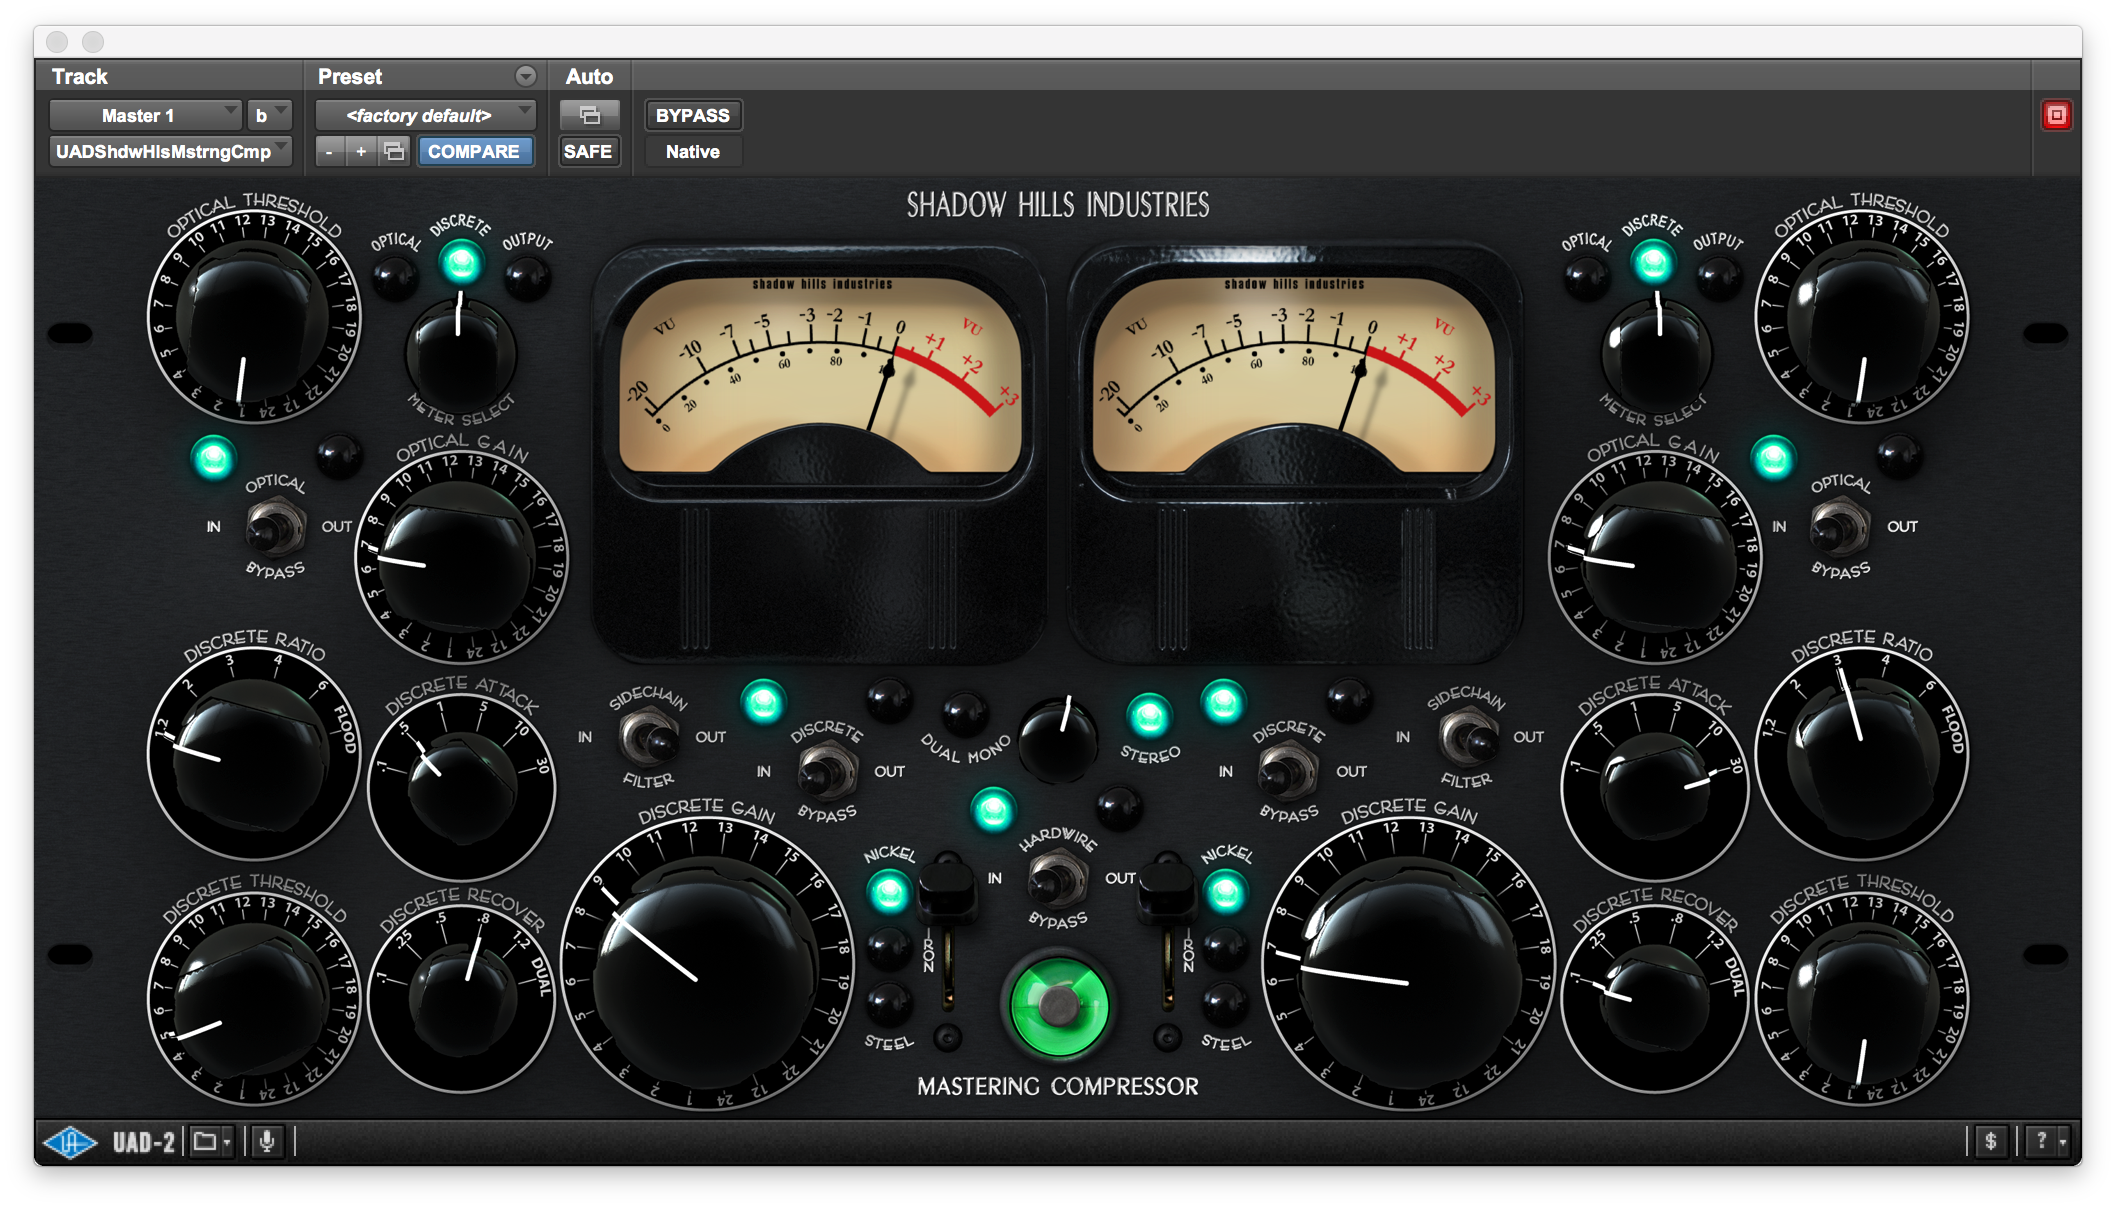
He chooses a UAD Shadow Hills Mastering Compressor plug-in for this task. It features two different compression types, Optical and Discrete (VCA). He prefers the latter for this task. He sets the meters to show gain reduction and puts the compressor into Stereo mode, rather than Dual Mono. In Stereo mode, the left and right-side parameters are linked, so anything he does on one side will be mirrored on the other. The advantage to that mode is that both sides of the signal get processed evenly. Thorp says he recommends that people try it both ways, but says you have to pay close attention to the settings in dual mono.
Why do the dual mono settings require more attention? For one thing, you need to be careful that the left and right outputs are set exactly the same. You also need to be cognizant that when an element that’s panned to one side or the other triggers the compressor, the compression will be applied more on that side, and that can make the center of the stereo image seem to pull in the opposite direction. Not all engineers think that’s necessarily a bad thing, but it’s something to keep in mind when you’re listening to the compressed track.

Thorp uses the UAD Shadow Hills Mastering Compressor, a versatile and extremely smooth-sounding compressor.
Thorp sets the ratio of the Shadow Hills Mastering compressor to its lowest setting, 1.2:1, which means that when the signal exceeds the Threshold, it will only be lightly compressed. He then plays the track and adjusts the Threshold parameter as it’s playing back. He says he will lower it until the gain reduction meters “start dancing." In this case, his Threshold setting yields about 1dB of gain reduction.
ATTACK OF THE COMPRESSORS
Next, he adjusts the Attack and Release parameters while the song is playing back, letting his ears dictate the settings. Anytime you use a compressor the attack setting has a major impact. Really fast attack settings will soften transients and make everything seem more squashed because the attack portions of the audio will not be as sharp due to the compression. With a slower attack time, the initial transient of the sound gets through before the compressor clamps down, which yields a more natural sound.

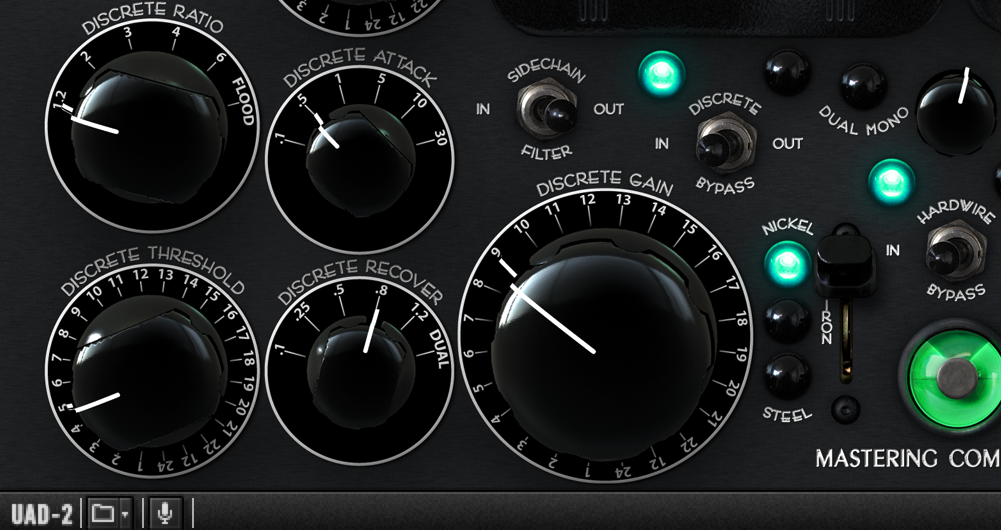
Here’s a closeup showing the settings Thorp ended up with. A low ratio, a fairly fast attack and a release that’s a little toward the slow side. He set the threshold to create about 1dB of gain reduction.
Because this song was recorded in a live situation and is sonically less controlled, Thorp decides to set the Attack relatively fast to help solidify the mix into a more cohesive whole. In studio parlance, he’s using the compressor to “glue" the mix together. Applying such sonic glue is one of the main reasons for using a master bus compressor. Because of the nature of the source material, Thorp has to use faster-than-usual Attack settings to make it sound more contained.
He says he sets the Release setting about the same. The Release governs how quickly the compressor lets go after it clamps down on a transient. A release setting that’s too fast can cause “pumping and breathing," which are unnatural artifacts that you want to avoid. A setting that’s really slow means that the compressor will stay on virtually non-stop, never getting a chance to completely release because it gets re-triggered before it can do so. This can make the audio sound too quiet.
Using your ears is the best way to adjust the parameter. If your compressor has an auto-release, it’s certainly worth trying that first, as it’s designed to find a setting that will avoid pumping but also keep the material sounding loud.
The last parameter adjustment that Thorp makes is the Makeup Gain, which turns up the output to compensate for the gain reduction caused by compression. In this case, Thorp pushes it as high as possible without going over 0dB, which could cause clipping and digital distortion.
RELEASE THE PARAMETERS
The following are a couple of audio examples that will show how the attack and release settings impact the sound of a compressor.
EXAMPLE 1: Here’s an example on a full mix. You’ll hear a short section that plays three times with pauses in between each repeat. The first time through the UAD Shadow Hills Mastering Compressor is bypassed. Then it’s turned on with a really fast attack. The third time around the attack is set to its slowest setting. These are exaggerated settings, but the idea is to hear what the different attack times are doing to the audio. When the attack is fast, it’s squashing down the transients noticeably.
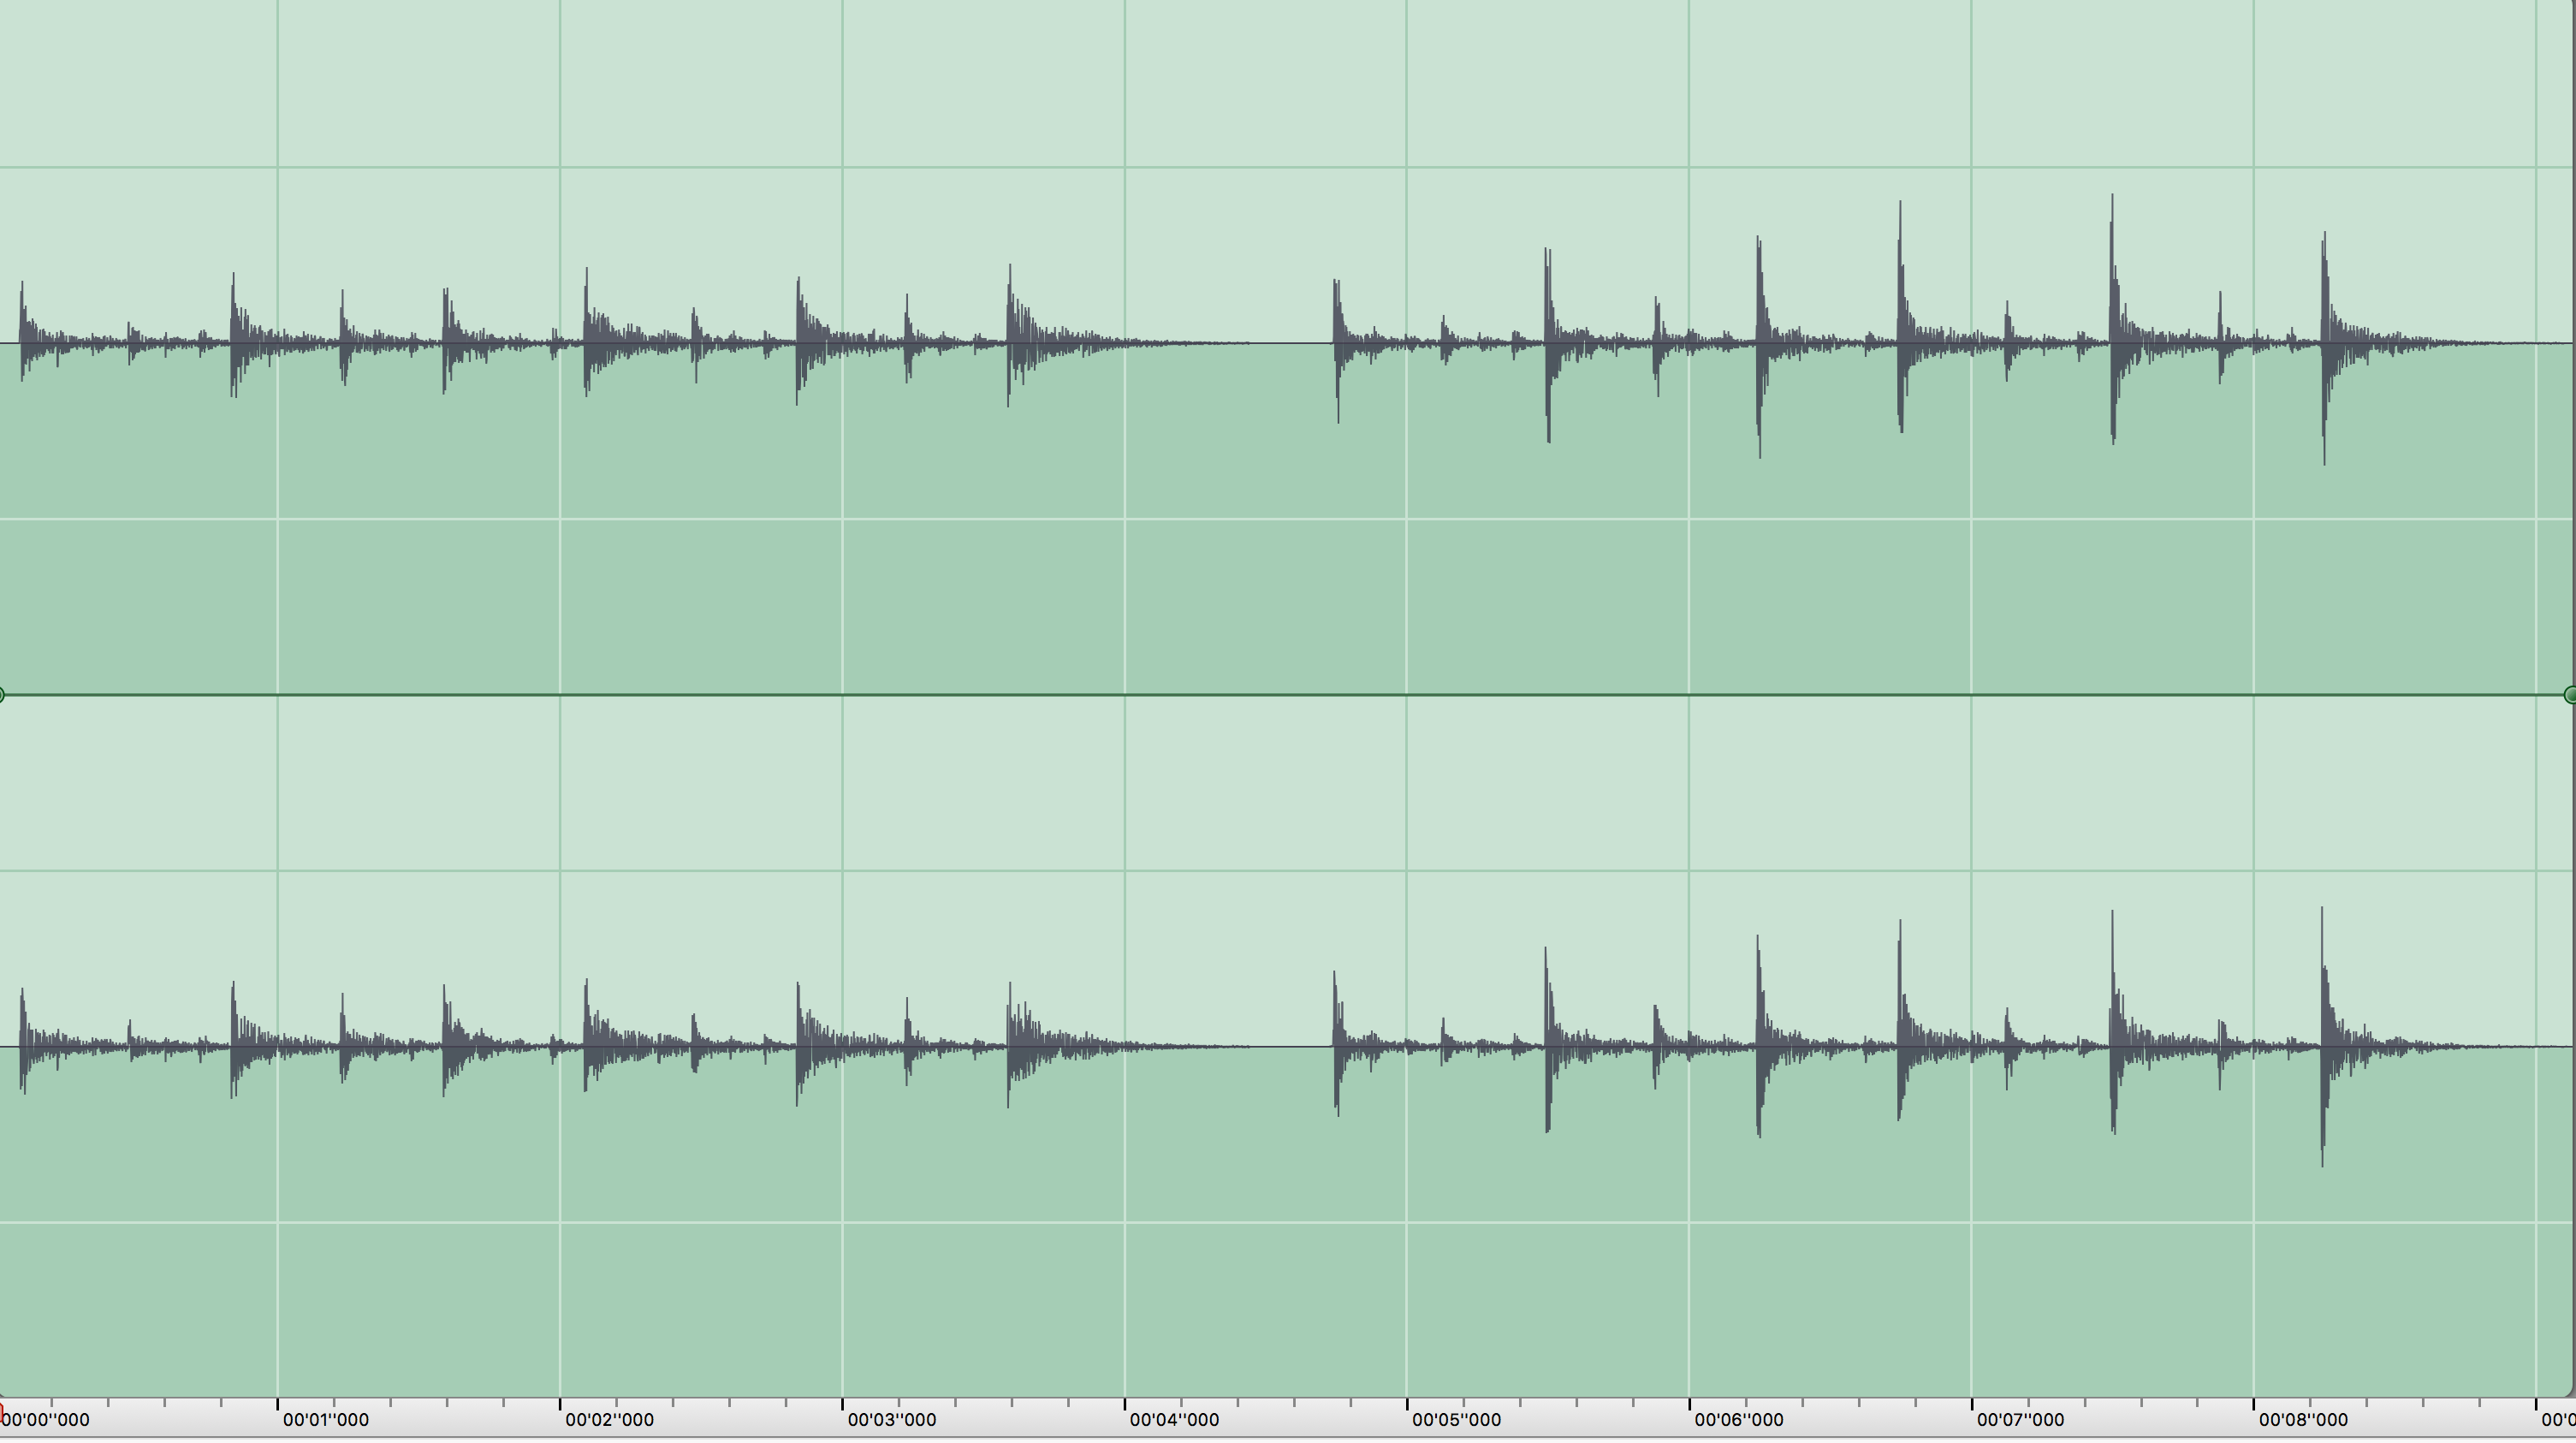
EXAMPLE 2: This time, a short passage on a soloed snare drum repeats twice with a space in between. It’s being compressed with the O-Pressor in Eventide’s Ultrachannel plug-in. The first time the Attack is set at its fastest setting (0.1ms) and squashes the initial transients, making the snare hits less impactful. The second time the Attack is set a lot slower (18ms), allowing the snap of the snare drum to come through a lot more.

Here are the waveforms for Example 2. You can see clearly how much louder the snare hits are on the right, where the attack is set slower.